Tracking Late Arrivals and Early Dismissals

There are times when the school needs to track when students arrive late to school, or when they leave early. In most cases, you can use the Sign-In/Sign-Out app in QuickSchools, which works like a kiosk for signing in students on premise. If you want students/parents to notify the school of late arrivals or early dismissals from their portal, then the Online Forms app might be the better way forward.

Submitting Forms

Here’s an example of how you can use the Online Forms to allow parents to notify the school about late arrivals and early dismissals. A parent simply needs to log into his/her account and fill out the form every time their child comes in late or needs to leave early.

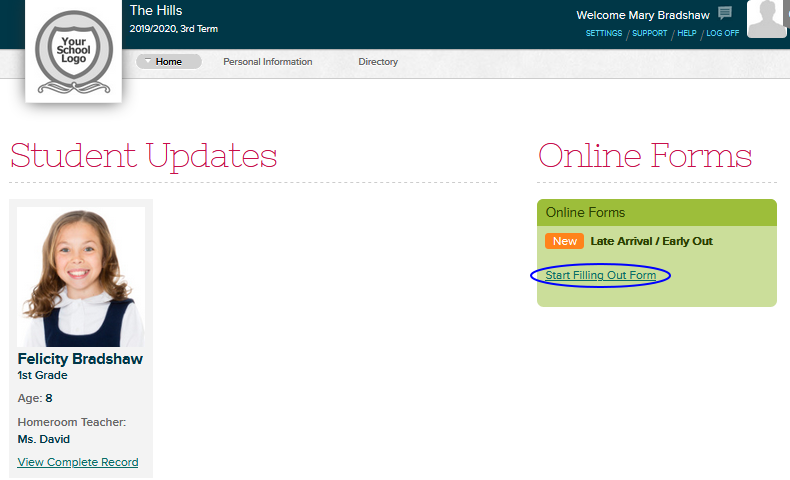
The form can be as simple as the example form below. The parent will fill out a few fields and then submit the form.

Parents can use the same link to submit the same form over and over again, for different days, or for different students.

Reviewing Submissions

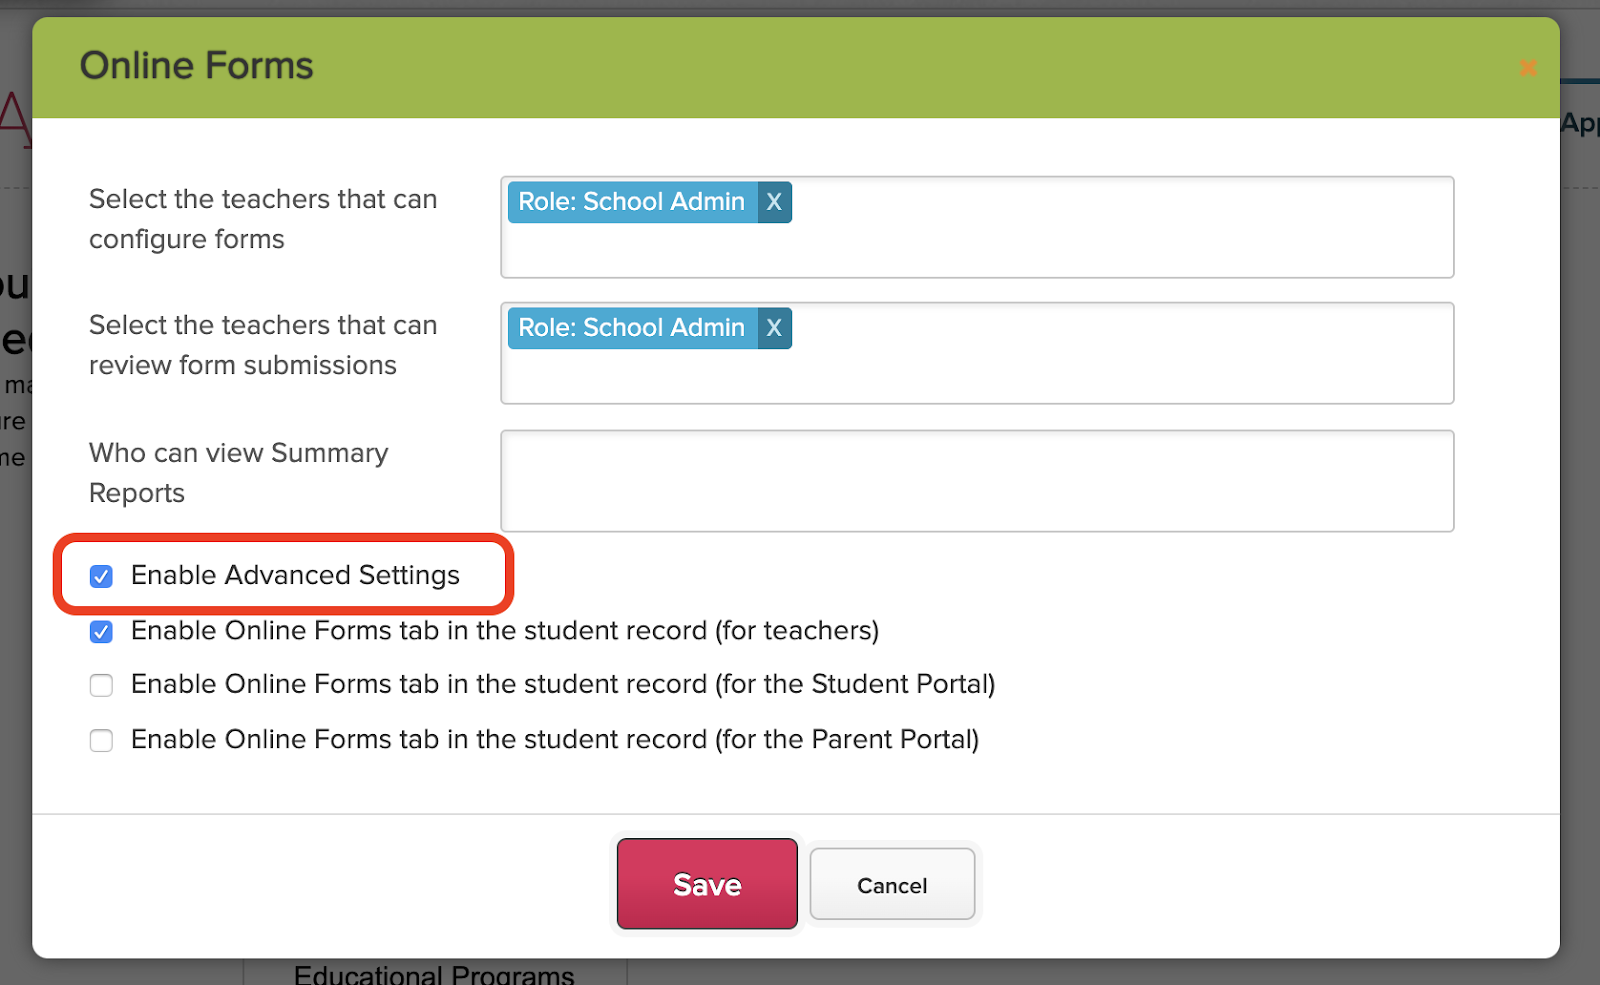
As an administrator, you can be notified via email whenever a form is submitted. You just need to add the appropriate emails when configuring the Notification Emails:

Read More »

Sign-In Sign-Out App Review

The Sign-In Sign-Out app has been on the QuickSchools App Store since 2014, with various improvements made over the years:

This article aims to clarify some of motivations behind the app.

This Sign-In Sign-Out app was originally designed to digitize a paper process. So if a student arrives late, and is required to sign-in at the front office, instead of filling in a paper sheet, an administrator can record that the student came in late via this app in QuickSchools. The staff would simply select the student from a list of students, in order to sign the student in or out. The system would record the date and time of the event.

Sign-in/Sign-Out for Administrators
Read More »

Interested in an Online Demo?

We designed QuickSchools to be as simple and easy to use as possible. With on-screen video tutorials, online manuals, and live chat, schools can easily jump in and try things out all on their own. We even offer a free trial with complete access to all of our features to get started. However, if you prefer to see QuickSchools live in action, or if you have more complicated questions to ask, you can schedule an online demo with us. Demos typically last between 20-40 minutes. Here’s what our standard agenda includes:

  • School Details
    • Share basic information about your school. We’ll then tailor the live online demo to fit your requirements.
  • Why Quickschools?
    • We’ll discuss what makes Quickschools different compared to other Student Information Systems.
  • Live Demo
    • We’ll demo some of our features! The features highlighted will be specific to your needs.
  • Pricing Information
    • Our pricing information is available here, which we will briefly review.
  • Q&A
    • Here’s where we’ll take on any questions you may have.

If you are interested, you can request an online demo via chat, emailing us at support@quickschools.com, or by scheduling via the link below:

Schedule a Demo!

Connecting to Canvas

So for new schools connecting to Canvas for the first time from QuickSchools, Canvas has added a new security feature, where you have to authorize external systems for integration (via a Developer Key). Remember that the integration from QuickSchools to Canvas only works for the paid version of Canvas for schools (not the free version for teachers).

Enabling the Developer Key

In Canvas, go to “Admin” > “Developer Keys” and click on the “Inherited”:

Enable Developer Keys in Canvas to connect to QuickSchools

From there, scroll down and find the “QuickSchools” app. You may need to to click on “Show All Keys” at the bottom to view more apps:

Enable the Developer Key to QuickSchools in Canvas

Finally, just turn on the Developer Key.

Connecting in QuickSchools

Back in QuickSchools, once the app is installed and enabled from the App Store, go to the Canvas App and click on the “Connect to Canvas” button:

Read More »

Patch Release – June 2, 2020

QuickSchools has just released some minor improvements to the Online Forms apps, to help schools with processing new students for the new school year. Improvements are described below:

Download Forms

As users are filling up the forms within your form packet, there is now a new “Download Forms” button, that allows users to download completed forms before submission:

Users can select whether to download all forms, or just specific forms from the packet:

Read More »

Mass Messaging

Looking for a quick and easy way to announce or send messages to all your students and parents about an upcoming event or activity? Well, look no further than the Messaging module in QuickSchools.

Send Emails via the Messaging Module

There are systems out there that focus purely on messaging capabilities. However, with these standalone systems, you have to manage your recipients separately, through a complicated process of exporting and importing contact info between systems. With QuickSchools, everything is integrated. That means that you can send out messages easily by grade level, by homeroom, or by subject/course. You can even create your own recipient lists for things like the parent council, school-related clubs or committees, and so on. And contact information is always kept current by the student information system (SIS).

Read More »

Online Forms for Districts / Groups

If you have a group-school or district setup in QuickSchools, you can actually configure your Online Forms to be shared across multiple sites. This means that you’d only need to set up a single form packet to process applications for ALL schools in the group/district. Applications can then be routed to the appropriate school as needed.

To set up this feature, you’ll first need to enable the Advanced Settings in the Online Forms app from the App Store:

Enabled Advanced Settings for the Online Forms App

Once that’s enabled, clicking “Configure Form Packet” will include the “Advanced Settings” at the bottom of the page.

Configure Form Packets

To share the form packet with other sites in your group/district, simply add any additional schools to the list under the “Advanced Settings” section:

Read More »