QuickSchools is designed to be an intuitive, user-friendly Student Information System (SIS). However, we know that every school has unique needs when it comes to training and support. Whether you’re a new user exploring the platform or an experienced administrator looking to optimize your workflows, this guide compiles all the resources you need to master QuickSchools effectively.
In an era defined by digital transformation, schools are increasingly turning to technology to streamline administrative tasks and improve efficiency. One such solution is the integration of school management systems like QuickSchools with educational platforms. For instance, leveraging Secure File Transfer Protocol (SFTP) for enhanced efficiency and collaboration with platforms such as Clever. In this blog post, we’ll explore the process of integrating QuickSchools with Clever via SFTP and discuss the benefits, step-by-step guide, and best practices to help you understand the importance and advantages of this integration.
Picture this: a world where managing school fees is as easy as a walk in the park. Welcome to the Payment Plan App – your key to unlocking unparalleled peace of mind. In this article, we’ll unveil 8 compelling reasons why the Payment Plan App is an absolute necessity in your life, transforming the way you manage school fees.
Are you tired of wrestling with complex financial arrangements and endless paper trails?
The Payment Plan Module has you covered. It’s truly the superhero solution for schools. With automated payment schedules at your fingertips, you can sit back, relax, and trust that every invoice will be paid on time, every time.
Did you know that you could track student lunch fees and payments via your Student Information System? If you didn’t, now you have!
QuickSchools provides you with a few application options to organize your cafeteria. The Lunchroom app is a fantastic way to track student lunches and lunch payments. This app helps to better manage student meals at school. It is one of our most popular apps, as it allows teachers to track each student’s lunch balance as well as configure meals and extras. You can easily track lunch payments as it displays the outstanding balance for each student. Gone are the days you would have to manually keep track of these records.
This article describes how schools can setup Free Lunch Orders through our new Lunch Ordering App (with Shopping Cart). This may come in handy when certain cases require this, such as when prospective students visit the school and want to try out the Cafeteria.
A summary of the steps are as follows:
Create a Dummy Student and Parent Account
Invite Parent via Parent portal
Add Credits for the Parent’s Lunch Ordering
Order lunches through the Parent Portal
Setup Dummy Student and Parent Accounts
You will need to setup a dummy account for a student and parent. If you want to have separate lunch orders per Grade Level/Homeroom, a dummy student account would need to be created for each grade level. However, all students can still be linked to a single Parent Account.
In order for the student to be excluded from the Attendance Roster (if Homeroom Attendance), set the Enrollment Date to a future date.
If you would be having more than one dummy student (one per grade), link the students as Siblings in order to access them all in a single Parent Portal.
Invite the Parent to the Parent Portal
Invite the dummy parent account by going to the Parent Portal > Invite tab > Click on the Invite button for the dummy parent.
Add Credits
Without a valid credit card, parents can only submit orders using Credits. You will need to add sufficient credits to the parent account, so as to complete lunch orders as necessary.
COMING SOON At this time, credits can only be added by QuickSchools Support Staff. The ability for the School Admin to add credits to users will be available soon.
Order Lunch for Students
Once credits have been added for the Parent, you can order lunch via the Parent Portal and checkout using the credits.
Select Meals in Lunch Ordering
Checkout Meals using Credits
The lunch orders can then be viewed through either the Lunch Ordering > Order Fulfillment tab, or our Lunch Ordering Reports.
If you have any questions or concerns regarding setting up Free Lunches, feel free to chat in, or send us an email at support@quickschools.com. Feel free to provide any suggestions or feedback as well.
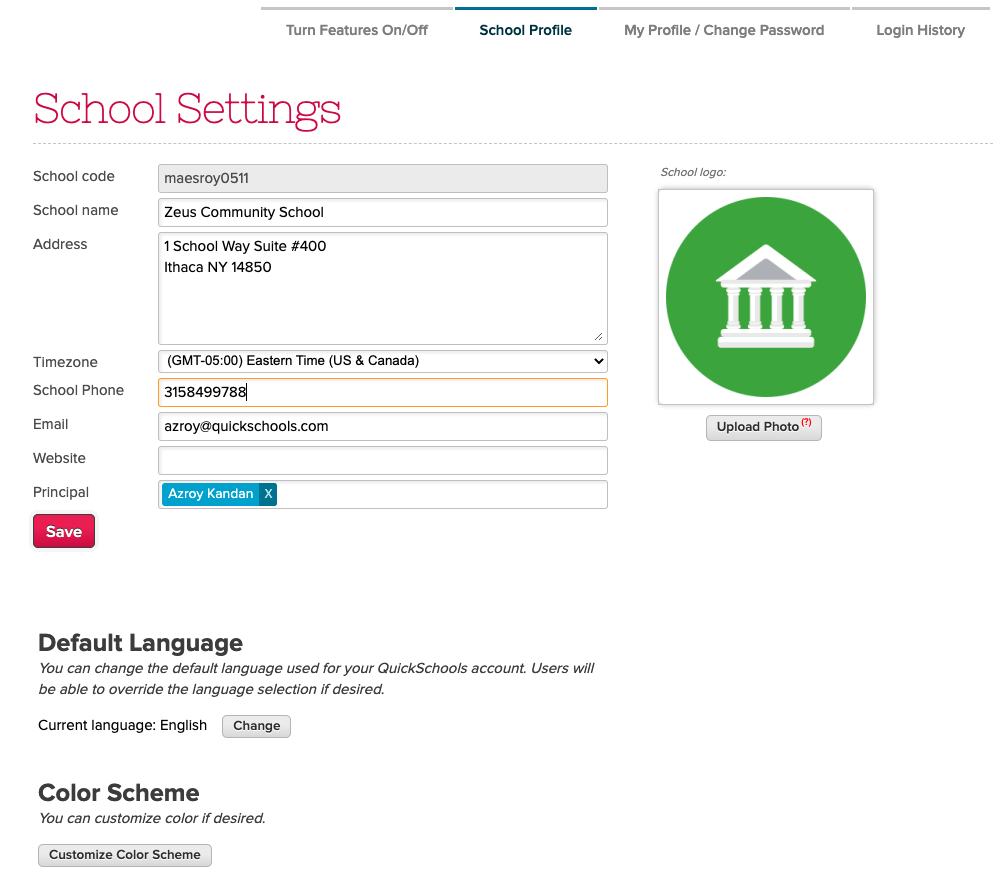
Your school is under new management, or perhaps has merged with another school, and you want to rebrand. Perhaps your school name has changed? Or, you have a new logo? Or, you have a new color scheme to promote your brand? What are the options available to you?
Here, we discuss the various steps you can take to re-customize the experience for users accessing your QuickSchools account.
Change Basic Profile Details
The first thing you should do as the school administrator is go to “Settings” > “School Profile”, and change the basic profile information for your school, such as your school name or uploading your new logo. This includes things like:
School name
School address
Contact info (Phone and Email)
Website
Color scheme
School logo
Update School Details under “School Profile”
The one thing you’ll note is that the School Code cannot be changed. This is because we use the School Code to partition your data into its own database. As such, this field cannot be changed once assigned to a school.
A lot of schools are okay with leaving the URL as-is because it does not incur any additional cost or effort. If changing the URL is important, there are a few options available to you:
Set-Up a Custom Domain
Create a new account
Migration via Group School
OPTION 1: Set-up a Custom Domain
QuickSchools offers a Custom Domain App. By using this app, you can set up your own URL for accessing your QuickSchools account. This option requires the least effort. However, the Custom Domain App incurs a monthly subscription. You will also need to register for your own custom domain and provide an SSL certificate from your provider.
With classes resuming, schools may be required to track Covid-19 proof of vaccinations from students and parents. One of the ways to do this in QuickSchools is via the Online Forms app. Here we discuss one sample implementation for collecting a Covid-19 Proof of Vaccination via the Parent Portal. This process can easily be extended to students and teachers too.
Here’s how we configured the Online Form with just a few simple fields. We also added a “Section Break” at the bottom, to add instructions about uploading their Proof of Vaccination:
Configure the Online Form to collect vaccination details
By clicking the “Configure” link, we also mapped the Name field to the Student Name, so that when accessed from the Student or Parent Portal, the student name field will be automatically filled:
When adding a new book to your catalog, there’s a new “Scan ISBN” button that allows you to quickly scan the ISBN barcode.
Look up Book Details by Scanning the ISBN Barcode
QuickSchools will then search the Google library, and pull details for the book, which you can use to create the book record in your QuickSchools Library App:
Book Details retrieved by Scanning the ISBN Barcode
Note that books pulled from Google will also contain an image of the book.
Generate Barcode and Label
When adding a book, you now have the option to generate a Barcode by clicking on the “Generate” button: