We’ve made several improvements to the Online Forms app in recent months. In this article, we wanted to highlight the different ways you can give parents (or students) access to online forms in QuickSchools, in order to submit data that you’re collecting for the schools.
The methods to be discussed are as follows:
- Portal Access (recommended for existing parents/students)
- Public URL
- Non-authenticated users
- Inviting Applicants
- HTML code snippet (i.e. Embed Code)
The access configuration elements are located near the top of the screen, right below the “Instructions” field:

Don’t forget that the Online Form Packet needs to be “Published” in order for access to be enabled. Once published, you should see a green check mark on the top of the screen, with a button to “Unpublish”:

Portal Access
The first access element is “Show this form to:”, where you can select specific teachers / staff, and/or “All Parents” and/or “All Students”. This option is the recommended option for existing users, since each submission will be directly linked to the user. When used in conjunction with “One From Per Child (OFPC)” (article coming soon), student-related fields in the form packet that are mapped to system fields are automatically filled when the applicant accesses the form. Applicants can then change the values if needed before submitting.
Public URL
In order to process data from new users, the Public URL is the most straightforward approach. This would essentially create a dedicated page on QuickSchools for processing submissions. You would then provide the link to users, either via your website, or via email.
Non-Authenticated Users
Since users accessing the Public URL are not logged into QuickSchools, users will typically need to submit the entire form packet in a single session (i.e. in one go). But there is an option in the Online Forms app for non-authenticated users to save their submission, and come back to it later, via a uniquely assigned Reference Number.

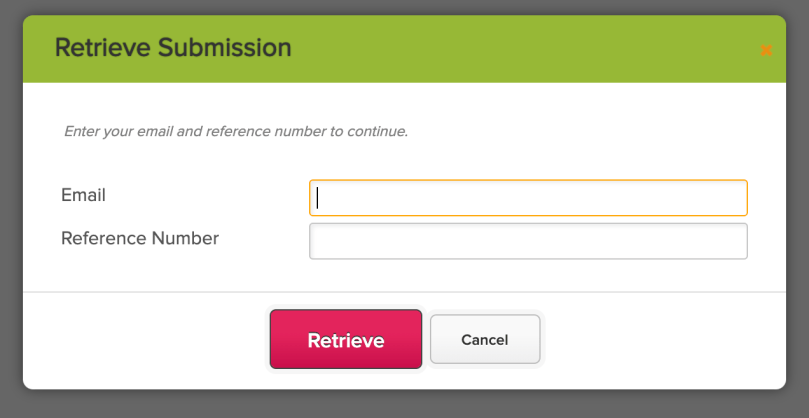
Details for this feature is described in a separate article (link below):
https://blog.quickschools.com/2018/07/09/online-forms-saving-your-submission/
Inviting Applicants
If receiving random unverified submissions is a concern, you can use the non-authenticated users function to lock down new public submissions, and only allow specific users access to continue filling in forms. The flow would go as follows:
- If a random unverified user attempts to access the Public URL, they will not be able to start a new submission. They can only continue an existing submission via a Reference Number.
- The applicant would then contact the school to get a Reference Number, either in person, or over the phone, or even via email.
- During this time, the school will verify the applicant’s eligibility (based on address, or financial support, etc).
- If eligible, school will manually create a submission for the applicant, which will generate a Reference Number.
- The Reference Number can be communicated to the applicant in person or over the phone.
- You can also use an Email Template to send the generated reference number to the applicant.
- The user can then use the Reference Number to access his/her submission via the Public URL.
This flow is mainly for public schools, where students need to be assessed for eligibility based on their home address. But this can also be extended to private schools where eligibility needs to be assessed prior to submission.

If you receive submissions from an external source, and you want to collect additional information via the Online Forms app, you can import new submissions via Excel, and then send out invitations via email, so that applicants can fill in any remaining info about their application. This process will be detailed in a separate article soon.
HTML code snippet
The final option for configuring access is to use the HTML code snippet. So instead of providing a link to applicants, you can embed the online form packet directly on your website. This provides a more seamless experience for visitors to your website, since they don’t have to leave your website in order to fill in the form.
As schools prepare for the upcoming school year, we’ll be posting more articles about the Online Forms app, and how it can be used to collect student data in preparation for the new school year. Please feel free to leave a comment, or chat with questions.
[…] Form Per Child (OFPC) is a setting within the Online Forms app in QuickSchools that allows you to designate one student per […]
[…] you have a group-school or district setup in QuickSchools, you can actually configure your Online Forms to be shared across multiple sites. This means that you’d only need to set up a single form […]
[…] schools has just released some minor improvements to the Online Forms apps, to help schools with processing new students for the new school year. Improvements are […]
[…] the school that the student is coming in late, or needs to leave early, we recommend using the Online Forms app to create a form that users can submit from their respective portals. We’ll be putting together […]
[…] webinar will likely be in February. We’re considering many different topics like Admissions or Online Forms. If there’s a particular area you’d like to learn more about, or if you’re interested in […]
[…] you’ve installed the Online Forms App, there is a new feature to allow you to automatically send out an email when the status of a […]
[…] We’ve made several improvements to our Master Scheduler, as well as to the Live Stream and Online Forms modules. Look forward to more LMS-related improvements in upcoming […]
[…] of the nice features about the Online Forms module in QuickSchools, is its ability to reduce work by the applicant by prefilling the fields […]
[…] is a new setting when configuring an Online Form packet to disable the Live Chat […]
[…] just a quick reminder that our Webinar Series will continue next month on the topics of Online Forms. This is also a large topic, and we may break it up into multiple sessions, to go over the various […]
[…] of vaccinations from students and parents. One of the ways to do this in QuickSchools is via the Online Forms app. Here we discuss one sample implementation for collecting a Covid-19 Proof of Vaccination via […]
[…] Form Per Child (OFPC) is a setting within the Online Forms app in QuickSchools that allows you to designate one student per […]
[…] of vaccinations from students and parents. One of the ways to do this in QuickSchools is via the Online Forms app. Here we discuss one sample implementation for collecting a Covid-19 Proof of Vaccination via […]
[…] you’ve installed the Online Forms App, there is a new feature to allow you to automatically send out an email when the status of a […]